How to Enable TPM on the ASUS GAMING Motherboard was one of the biggest question I had for a while. Few days back I was trying so much to enable TPM 2.0 in my PC inorder to install Windows 11.
However, I was not able to find the setting which was shared by Microsoft in their article “Enable TPM 2.0 on your PC”.
Eventhough, I followed their article step by step I always stuck with the question “how to enable tpm in bios”. After some thorugh research on internet I found the way to Activate/ Enable TPM on ASUS Z370 Motherboards. Following is the guide to
How to enable tpm in bios settings For Asus
- Check whether your Processor is capable of running Windows 11. To do this find your processor model by using Direct X Diagnostic Tool. Press Windows Key + R. Now type “dxdiag” and press enter.

2. Find the Name of your processor from the application.
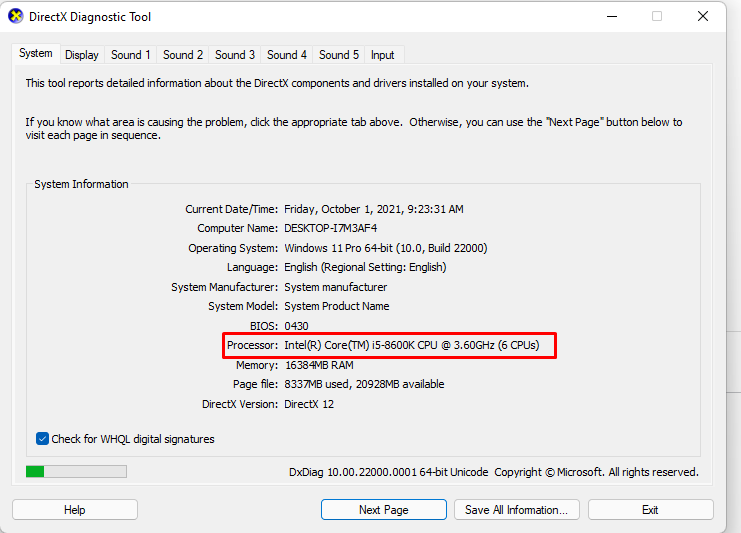
3. Go through the processor list in “Here are the CPUs that officially can run Windows 11” and check whether your Processor/ CPU name is mentioned. If it is mentioned that means you can Run windows 11.
4. After making sure that you can run windows 11. Restart your PC.
Also Check Cat Translator App How to get Meow Talk App
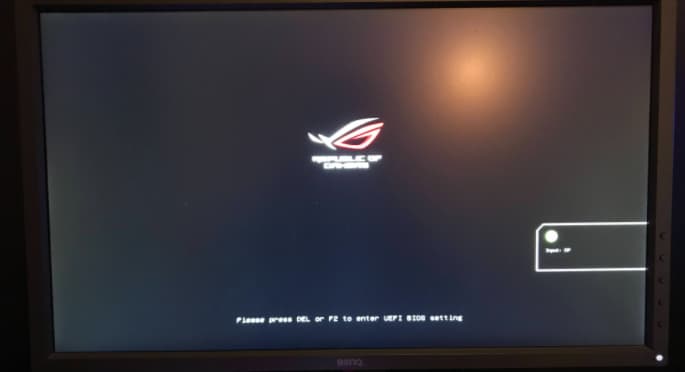
5. As soon as you see the below screen press either “DEL” Key or F2 Key on your keyboard. This will open your BIOS Settings.
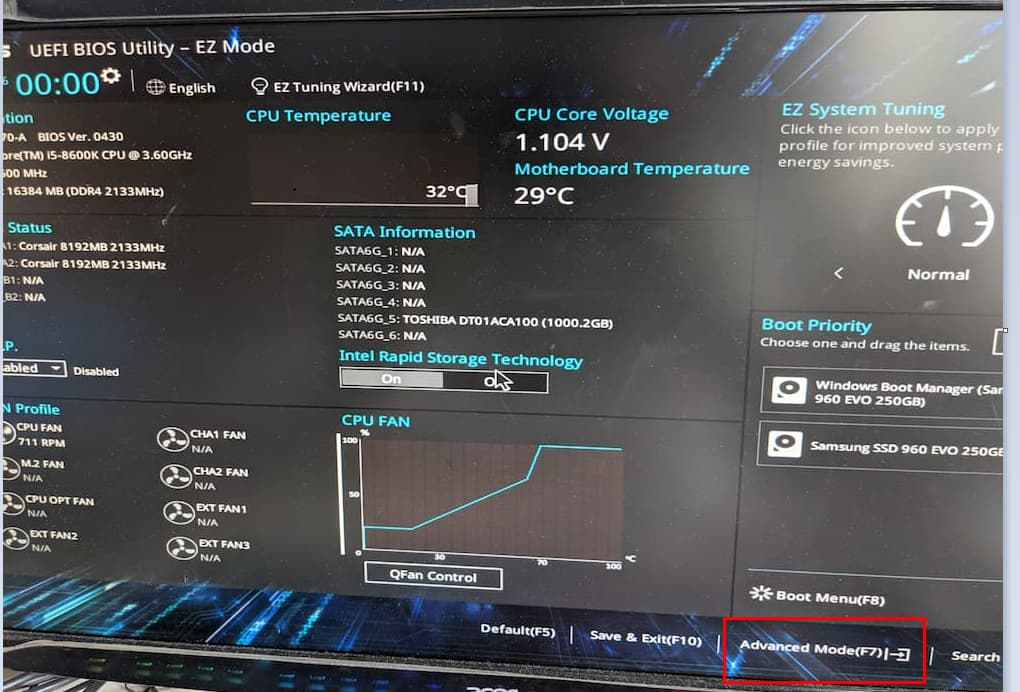
6. In the ASUS EZ Bios Setup Click on advanced.
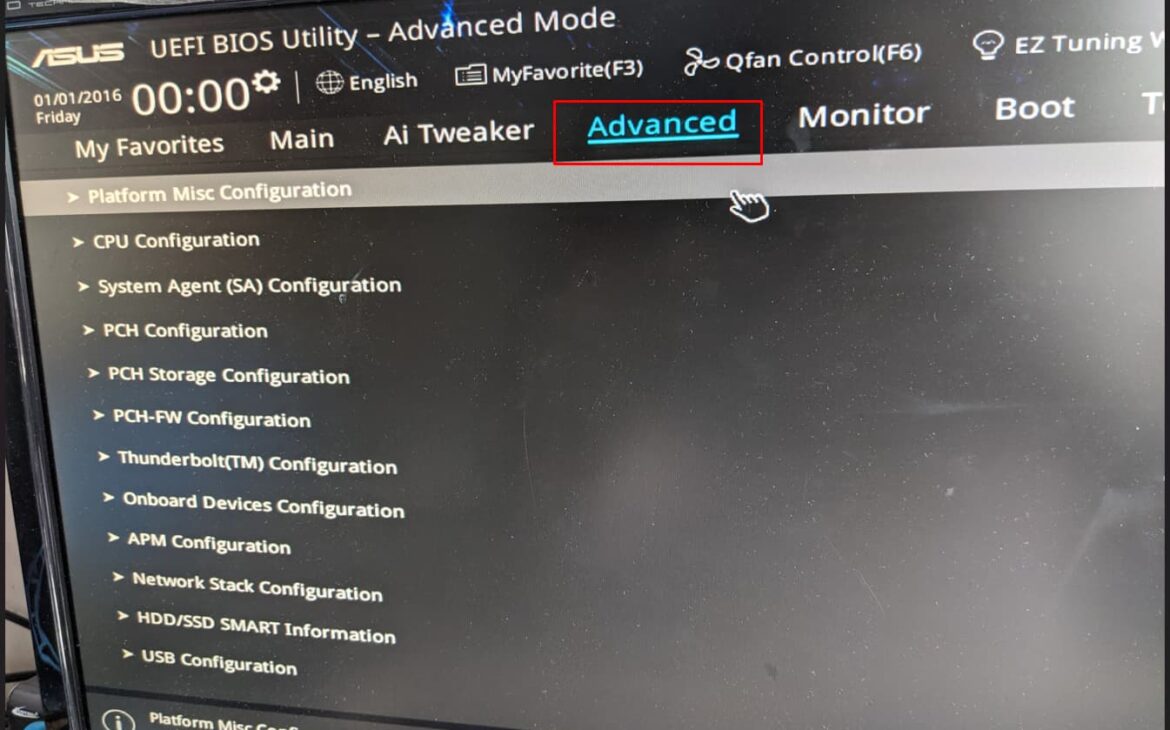
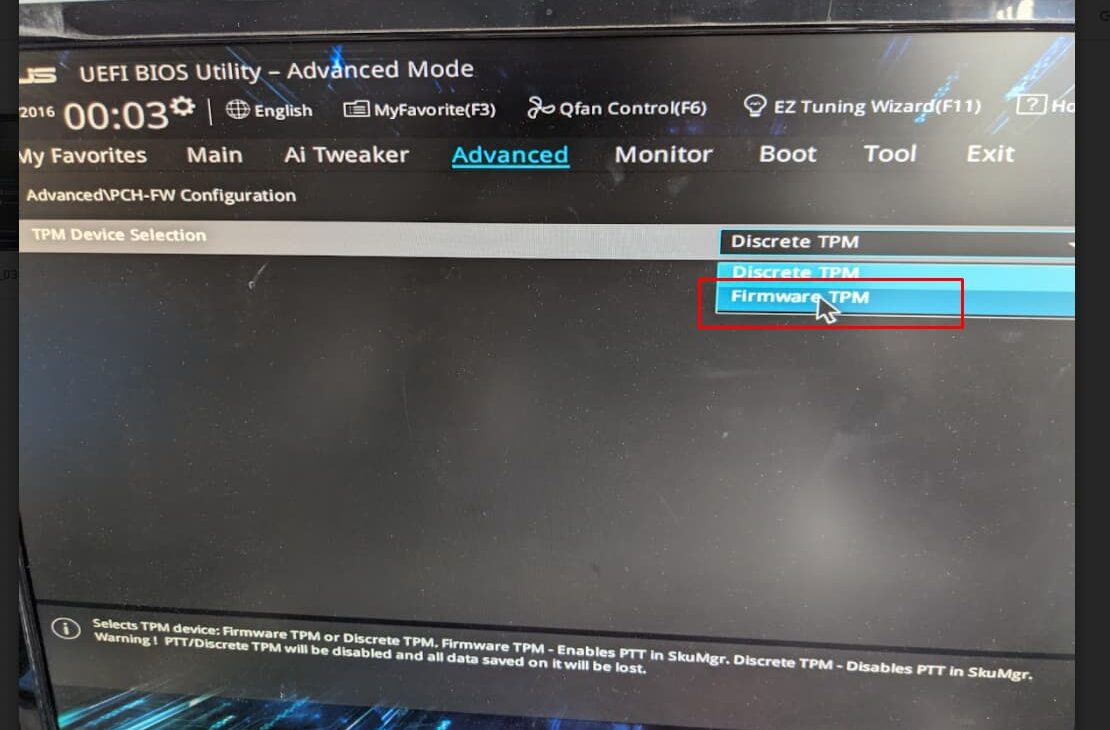
7. Now go to advanced tab.
If you are unable to find the post please check the below video.